
to create a class
1. Go to “Activities” from the side menuMake sure you’re in the “Teams” or “Schedule Management” section.
2. Click on “Add” and fill out the required information
3.You will have:
Basic Information
- Title – Required field for the name of the event or class
- Description – Required multi-line text area for a detailed event description
- Category – Dropdown to classify the event under a specific category
- Instructor – Field to assign a primary instructor to the event
- Sub Trainers – Dropdown to assign additional supporting trainers
Booking Settings
- Disable Client Booking – Checkbox to prevent clients from booking the event directly
- Ignore Trainer Conflict – Checkbox to allow scheduling even if the trainer has a conflict
- Outdoors – Checkbox to mark the event as an outdoor activity
- Select Field or Room – Dropdown to assign a specific venue/location
- Ignore Room Conflict – Checkbox to allow booking even if the room is already in use
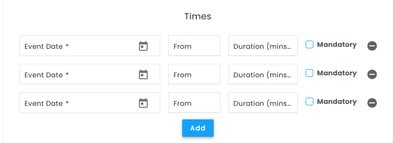
Times
- Event Date – Required date picker for scheduling the event
- From – Start time of the event
- Duration (min.) – Duration of the event in minutes
- Mandatory – Check this box to make the schedule mandatory. For example, if Tuesday and Friday are selected, booking a Tuesday will automatically select Friday as well.
- Add Button - Click to add a time slot. You can add multiple slots, which is perfect for recurring classes with the same details (e.g., Monday, Wednesday, and Friday). This allows different schedules to appear under the same class.
Repeat – Dropdown to set a recurrence pattern (e.g., daily, weekly)
Age Range & Levels
- Age Range: From / To – Fields to define the minimum and maximum age for participants
- Levels – Dropdown to specify skill/experience levels (e.g., Custom Levels)
- Slots Available – Indicates current slot availability
- Enable Single Session
Payment
Payment Rule – Set to "Use Global Payment Settings" by default, this can be overridden on a per-event basis. For example, if your online payment rule-global rule requires upfront payment for all bookings, this feature allows you to override that rule specifically for this class.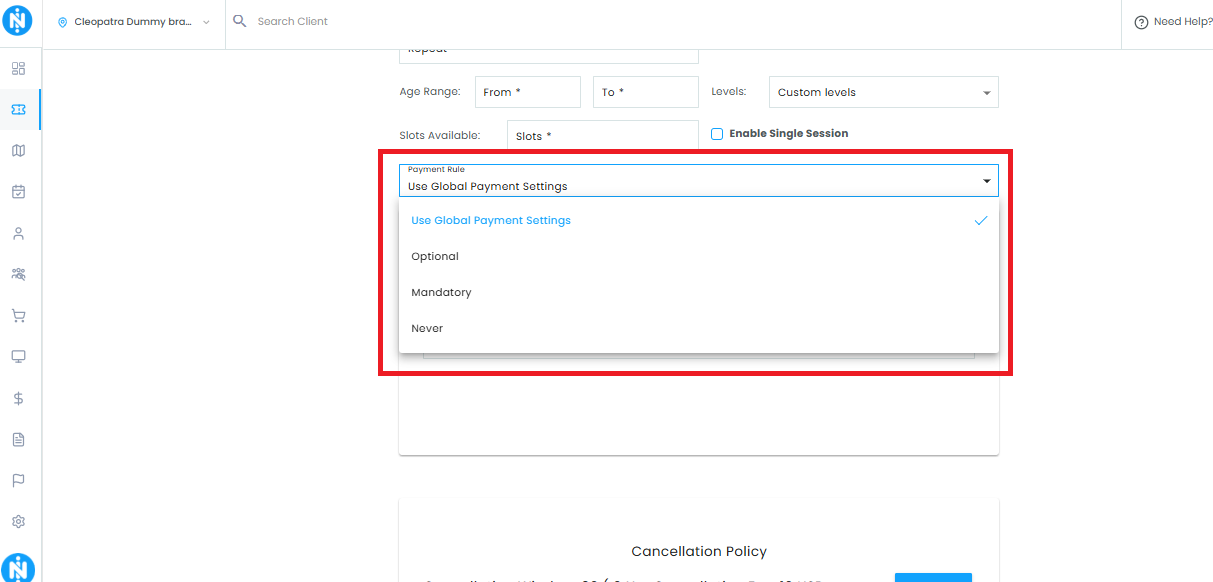
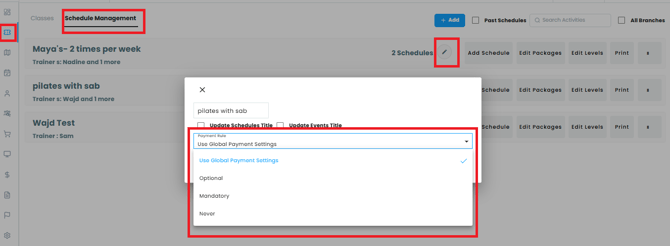
If the class has already been created, you can edit its payment rules here.
Packages
- Packages – Dropdown to select and link available packages, which means only clients with linked/allocated packages will be able to attend this class otherwise it will show as session owed in the client profile depending on the total allowable session owed set by business.
Cancellation Policy
- Cancellation Window – Displays the allowed cancellation window (e.g., 3 hours 30 minutes)
- Cancellation Fee – Displays the fee charged for late cancellations (e.g., $10 USD)
Wait-list Policy
- Total number of individuals who can be on the waitlist – Displays the current waitlist cap (e.g., 2)
- Override – Button to set a custom waitlist limit for this specific event
Form Actions
- Cancel – Discards changes and exits the form
- Save – Saves the event with all configured settings
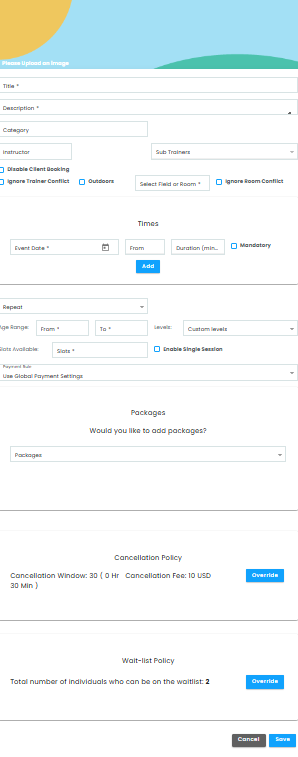
If the class already exists, click on "Add Schedule" next to the class name to add a new schedule for it.
Super easy procedure, you got this!😄