
1: View the Client List
The main table displays: No., Name, Email, Phone Number, Date of Birth, Level, and Client Privilege.
ℹ️ A duplicate-detection banner may appear, letting you Review & Merge potential duplicate client profiles.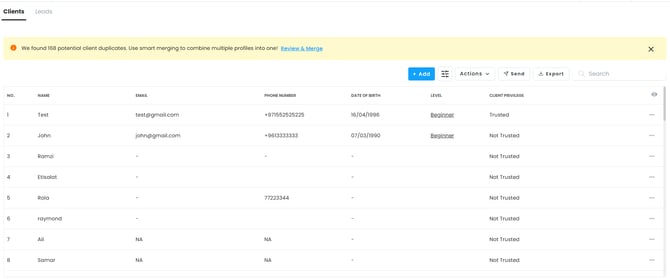
2: Add a Client ➡️ Click + Add
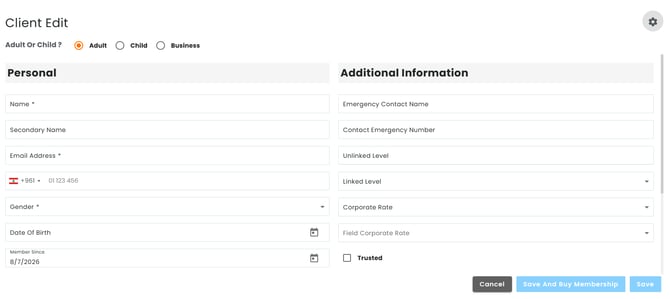
Fill in the Client Edit form:
- Profile Type: Adult / Child / Business
- Personal: Name*, Secondary Name, Email Address*, Phone Number, Gender*, Date of Birth, Member Since
- Additional Information: Emergency Contact Name, Emergency Contact Number, Unlinked Level, Linked Level, Corporate Rate, Field Corporate Rate, Trusted (checkbox)
- Actions: Cancel, Save and Buy Membership, Save
3: Filter Clients ➡️ Click the Filter icon
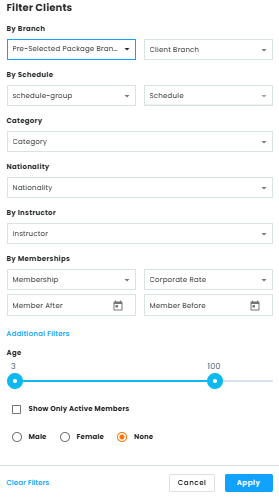
- By Branch: Pre-Selected Package Branch, Client Branch
- By Schedule: Schedule Group, Schedule
You can now choose a specific schedule and time slot.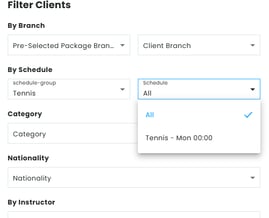
- Category, Nationality, Instructor
- By Memberships: Membership, Corporate Rate, Member After, Member Before
- Additional Filters: Age range, Show Only Active Members, Gender
4: Use Quick Actions ➡️ Click Actions
- Import from Excel: Upload a spreadsheet of client records to add multiple clients at once instead of entering them individually.
- Bulk Package Import: Assign a membership package or plan to multiple selected clients in a single action, rather than updating each profile separately.
- Review & Merge: Open the duplicate-detection list flagged in step 1, and combine duplicate client profiles into one, keeping the most accurate contact and membership details.
5: Send Communications ➡️ Click Send
- Email: Send a message to the selected client's email address on file, useful for announcements, reminders, or account updates.
- Push Notification: Send an in-app or mobile push alert to clients who have notifications enabled, useful for time-sensitive updates like schedule changes.
6: Export Data ➡️ Click Export
- Excel Export
- PDF Export
- Export
- Export With Notes
7: Customize the View ➡️ Click the eye icon (Edit Columns)
Choose which columns appear in the client list table.